To backwash a pool filter, identify the filter media and installed valve first. Sand and many DE filters use backwashing, but their finishing steps differ. A standard cartridge filter needs element cleaning instead.
Keep the exact filter and valve instructions beside you. Stop the pump before every control valve change. Never loosen a tank closure or fitting to release pressure.
Before you backwash a pool filter
Confirm that cleaning is due using the manufacturer’s trigger and comparable readings. A faster pump program can raise pressure without proving the filter is dirty. Use the filter cleaning timing guide if that comparison is unclear.
Read the tank label and identify the valve. A handle that moves up and down usually needs different instructions from a rotating multiport. Handle direction alone doesn’t establish which position is filtration.
| What you have | Use this route | Do not assume |
|---|---|---|
| Sand with a multiport valve | Its backwash, rinse, and return to filter procedure | That every system uses the same timing or speed |
| Sand with a slide valve | The labeled cleaning and filtering positions | That a separate rinse setting exists |
| DE with an approved backwash valve | Its cleaning procedure plus required DE recharge | That the sand filter finishing steps are sufficient |
| Standard cartridge | Remove and clean the elements | That a hidden backwash setting must exist |
If the last row applies, use the cartridge cleaning guide. If the equipment can’t be positively identified, stop and get its model confirmed.
Prepare the waste route and operating conditions
Confirm where wastewater may be discharged under local requirements. DE disposal can need particular handling. Don’t direct waste into the street, a storm drain, or neighboring property by default.
Fit the appropriate discharge hose if required. Check that the route is open, supported, and free of kinks. Keep water away from electrical equipment and places where it could cause flooding.
Check water level before starting and monitor it during the process. The system must not lose its water supply or run dry. Follow the heater and other equipment instructions for shutdown before changing modes.
Sand filter with a multiport valve
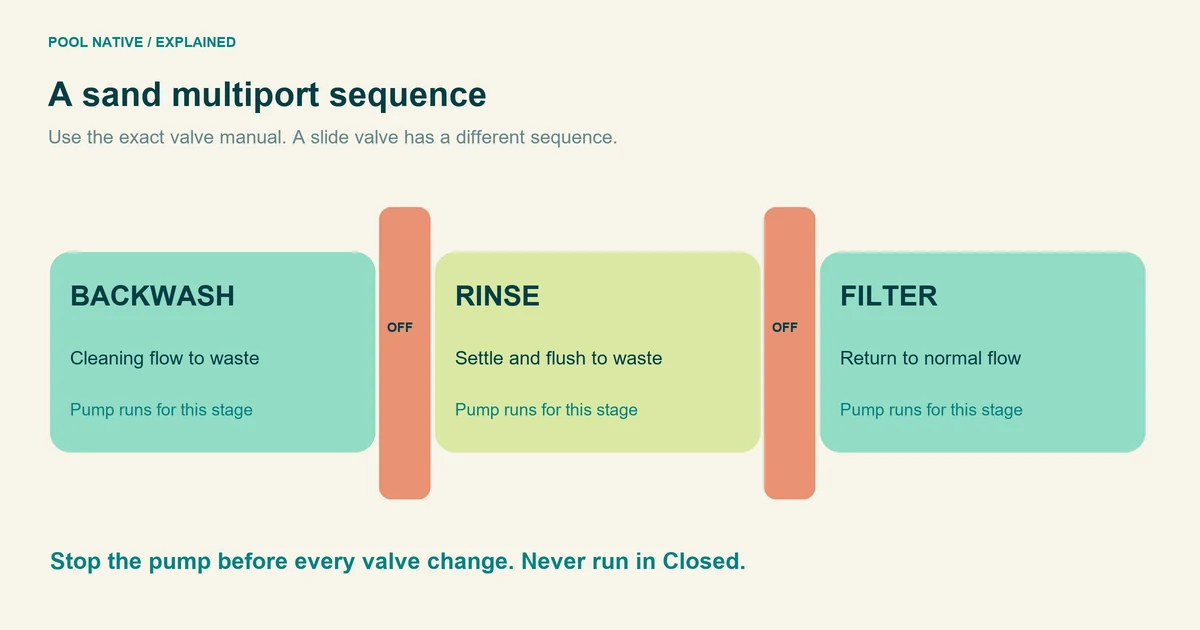
- Stop the pump and disable automatic restart as directed.
- Set the valve to Backwash using its operating instructions.
- Confirm the waste route is open and perform the specified startup and air release procedure.
- Stand clear and run at the approved cleaning flow until the manual’s endpoint is reached.
- Stop the pump before selecting Rinse.
- Run the specified rinse cycle, then stop the pump again.
- Return the valve to Filter, restore the correct water path, and follow the normal startup procedure.
- Verify flow, leaks, and pressure at the normal comparison setting.
On the referenced Triton system, the manual gives an approximate backwash duration and a rinse stage. Those figures belong to that equipment. Other systems need their own instructions, including their valve and flow requirements.
Don’t operate the pump with the control valve in Closed. Don’t turn a resistant handle with more force while water is pressurized. Shut down and investigate the cause.
Sand filter with a slide valve
Use the valve’s identified filtering and backwashing positions. Stop the pump before moving it, and secure the handle as instructed. The direction of movement is model specific.
Follow the approved cleaning flow and endpoint. Then stop, return to the filtering position, and restart using the air release procedure. Don’t invent a rinse position from a multiport guide.
If a valve leaks or will not lock properly, don’t continue cycling it under load. A service problem needs attention before normal operation. Keep the valve manual with the tank manual.
DE filters need their own finishing procedure
Backwashing removes collected debris and some or all of the working DE coating. The manufacturer specifies how to restore that coating. Running without the required recharge isn’t a complete cleaning job.
Use the exact model’s quantity and procedure. Don’t assume every DE filter uses the same amount per square foot, or that a coffee can measures a known weight. Product density and scoop design matter.
The referenced FNS Plus guide adds the prescribed slurry through the skimmer with the pump running. That sequence differs from instructions that tell readers to pour material into a stopped system. Match both the filter and valve instructions before acting.
A separation tank adds its own pressure release, emptying, and reassembly steps. Regenerative designs may also use a different service method. Don’t force those systems into the simple sand filter sequence.
Follow the DE label and safety data sheet for dust control, protective equipment, and disposal. Don’t replace pool filter DE with another grade. Don’t add DE to a standard cartridge filter.
Check the outcome, not just the sight glass
Clear waste water is one observation during cleaning. The job also needs a correct final valve mode, required media recharge, normal return flow, and no leaks. Restore the intended pump schedule afterward.
Compare pressure at the same setting as the clean reference. If it remains high, don’t record the job as successful merely because the water looked clear. Follow the checks for pressure that stays high.
If sand enters the pool after the specified procedure, use the sand discharge guide. Persistent media return isn’t something to conceal with extra vacuuming.
Record enough to improve the next cleaning decision
Log the date, reason for cleaning, pump setting, and before and after readings. For DE, record the actual recharge product and amount. Note any unusual discharge or rapid pressure return.
Keep the record in the maintenance log. It helps distinguish a normal cleaning cycle from a recurring fault. It also prevents the next person from repeating a procedure without knowing what happened.